If you’re looking for an affordable way to keep your car’s paint flawless, DIY paint protection film is the ultimate solution. With rising repair costs & everyday risks like scratches, chips, & minor abrasions, protecting your car’s exterior has never been more important. Luckily, self-install DIY PPF allows car owners to safeguard their vehicles without spending hundreds on professional services.
From peel & stick PPF to full car paint protection kits, the process is simpler than many expect, especially when following step-by-step guidance. In this guide, we’ll explore all the essential tips, techniques, & tools you need for successful DIY paint protection film installation at home, ensuring your car stays glossy, scratch-free, & well-protected for years to come.
What is DIY Paint Protection Film?
Understanding the Concept of Paint Protection Film
DIY paint protection film (PPF) is a thin, clear, durable layer applied to your car’s exterior to shield the paint from scratches, chips, & environmental damage. Unlike professional installations, DIY PPF allows car owners to apply protective film themselves, saving money & gaining full control over the process.
Benefits of Using DIY PPF
- Protects against minor scratches, rock chips, & UV damage
- Cost-effective compared to professional paint protection
- Easy removal & replacement without damaging the paint
- Enhances resale value by keeping paint in pristine condition
Common Misconceptions About DIY PPF
Many car owners believe self-install DIY paint protection film is too complicated. In reality, with proper tools & techniques, even beginners can achieve smooth, bubble-free results.
Types of DIY Paint Protection Film
Peel & Stick PPF
This type of DIY PPF comes pre-cut & ready for simple peel & stick application. It’s ideal for beginners looking for easy car paint protection.
Liquid or Spray-On PPF Alternatives
Some protective films come as sprays or liquid coatings. While they provide temporary protection, traditional clear film offers superior durability & long-term defense.
Full Car vs Partial Coverage
- Full car coverage: Protects the entire vehicle, ideal for brand-new cars
- Partial coverage: Focuses on high-risk areas like the hood, bumper, & mirrors
Tools & Materials Needed for DIY Paint Protection Film
Essential Tools for Successful Installation
- Squeegee for bubble-free application
- Spray bottle with soap & water solution
- Clean microfiber cloths
- Precision knife or cutter
Choosing the Right DIY PPF Kit
Look for kits that include pre-cut templates, installation fluid, & clear instructions. Brands offering step-by-step guidance reduce installation errors.
Preparing Your Car for PPF
- Wash & dry the vehicle thoroughly
- Remove all dirt, grease, & wax
- Work in a dust-free, shaded environment to avoid imperfections
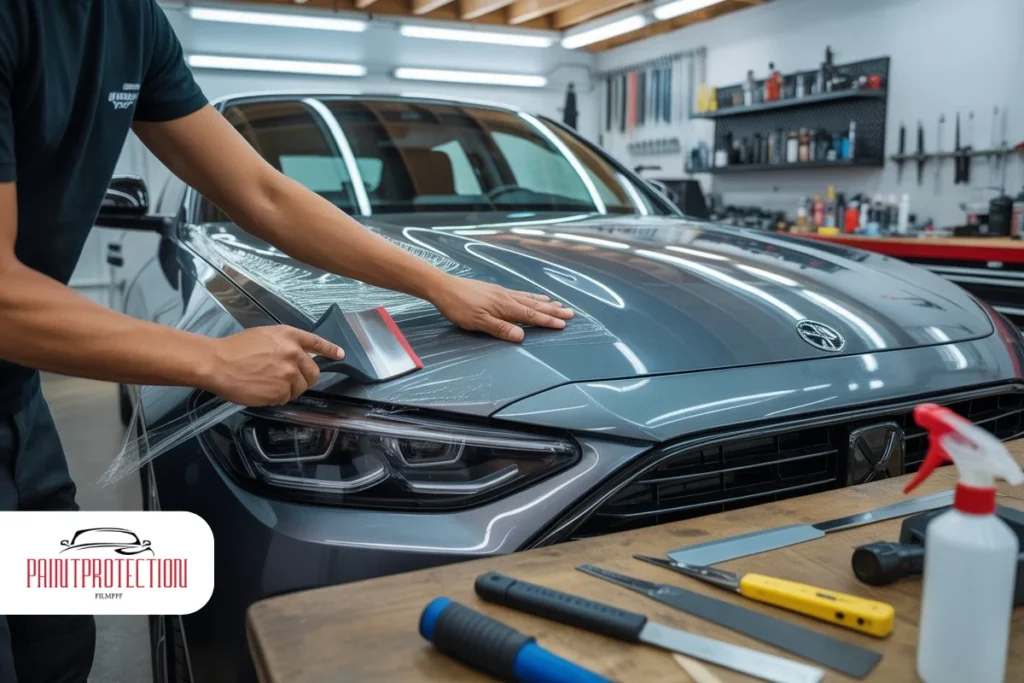
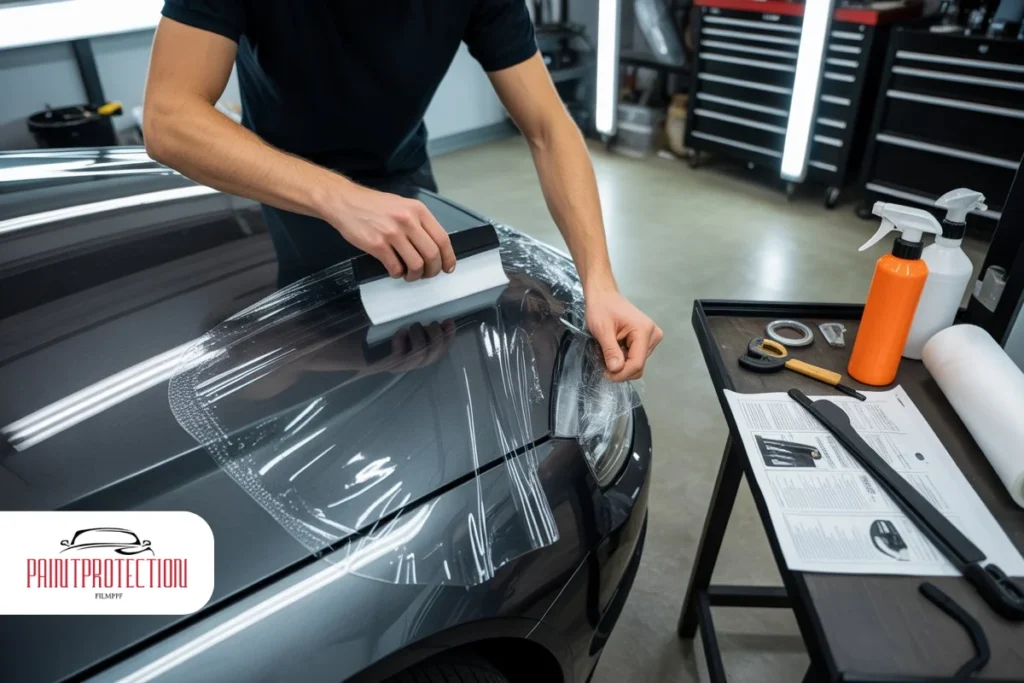
Step-by-Step DIY Paint Protection Film Installation
Step 1 – Clean & Prep the Surface
Ensure your car’s surface is spotless. Any dust or debris can cause bubbles under the DIY paint protection film.
Step 2 – Position the Film
Carefully align the PPF on the target area. Start from one edge & slowly peel back the protective layer while smoothing it onto the car.
Step 3 – Apply & Smooth the Film
Use a squeegee to remove air bubbles & excess fluid. Work from the center outwards to ensure a clean, professional look.
Step 4 – Trim & Secure Edges
Trim excess material carefully with a precision knife. Press down all edges to ensure long-lasting adhesion.
Step 5 – Post-Installation Care
Avoid washing the car for 48 hours. Check the film regularly for lifting edges & reapply if necessary.
Tips & Tricks for Perfect DIY PPF Application
Work Slowly & Patiently
Rushing the installation increases the risk of bubbles, creases, & misalignment. Take your time for flawless results.
Use Plenty of Solution
Spraying ample soapy water solution allows the film to slide easily & reduces the chance of permanent bubbles.
Avoid Direct Sunlight
Heat can make the film sticky too quickly, leading to poor adhesion. Work in shade or indoors.
Repair Minor Mistakes Quickly
Small wrinkles or bubbles can often be lifted & repositioned. Use a squeegee to smooth them out promptly.
Maintaining Your DIY Paint Protection Film
Cleaning & Washing Tips
- Use mild soap & water
- Avoid abrasive cleaning tools
- Dry with a microfiber cloth to prevent scratches
Inspecting the Film Regularly
Check for peeling edges, discoloration, or air bubbles. Addressing minor issues early extends the life of the DIY paint protection film.
Lifespan & Replacement
Most high-quality PPF lasts 5–7 years, depending on environmental exposure & maintenance. Replace as needed to maintain optimal protection.
Common Mistakes to Avoid
Skipping Surface Preparation
Dirty or oily surfaces cause bubbles & reduce adhesion. Always prep carefully.
Using Insufficient Solution
Too little soap & water makes the film stick too early, increasing errors.
Ignoring Temperature Conditions
Extreme heat or cold can affect the flexibility & adhesion of the film.
Overstretching the Film
Pulling too hard may distort the film, leaving wrinkles or gaps.
DIY vs Professional Paint Protection Film
Cost Comparison
DIY PPF kits are significantly cheaper, costing 1/4–1/3 of professional installation.
Skill & Time Considerations
Professional installation is faster & often flawless, while DIY requires patience & practice.
Pros & Cons of DIY Approach
Pros: Cost-effective, flexible, convenient
Cons: Learning curve, risk of bubbles, longer installation time
Final Thought
DIY paint protection film offers car owners a cost-effective & efficient way to protect their vehicle’s exterior. By choosing the right tools, following step-by-step guidance, & avoiding common mistakes, anyone can achieve professional-looking results at home. Whether you’re shielding your hood, bumper, or full vehicle, DIY PPF ensures your car stays scratch-free, glossy, & well-protected for years to come. Investing a little time & patience now can save hundreds in future repair costs & maintain your car’s pristine appearance.
FAQs
What is DIY paint protection film (PPF)?
DIY paint protection film is a clear, durable layer applied to your car’s exterior to prevent scratches, chips, & minor paint damage.
Can I install paint protection film myself at home?
Yes, with the right tools, prep, & step-by-step guidance, DIY PPF can be applied at home effectively.
What tools do I need for DIY PPF installation?
Essential tools include a squeegee, spray bottle with soapy water, microfiber cloths, & a precision knife.
How long does DIY paint protection film last?
High-quality PPF typically lasts 5–7 years, depending on maintenance, environment, & car usage.
Is DIY PPF cheaper than professional installation?
Yes, DIY kits are significantly more affordable, often costing 1/4–1/3 of professional services.
Can I cover my entire car with DIY PPF?
Yes, full car coverage is possible, but beginners may start with high-risk areas like the hood, bumper, & mirrors.
How do I maintain DIY paint protection film?
Clean gently with mild soap & water, avoid abrasive tools, inspect regularly for bubbles or peeling, & replace when needed.