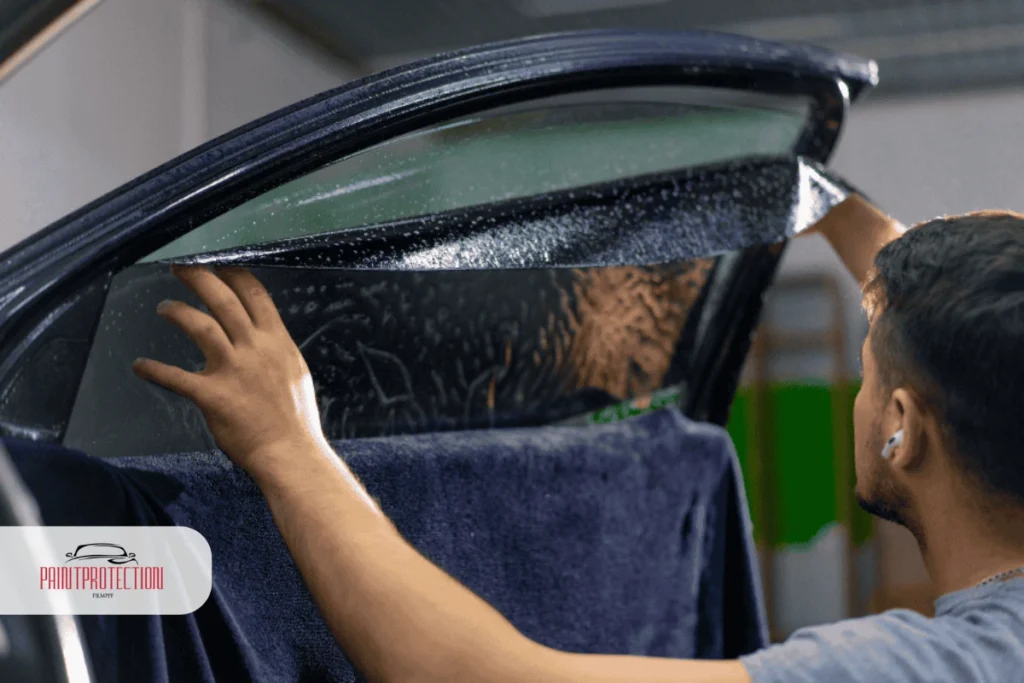
Learning how to tint car windows is one of the easiest ways to upgrade your vehicle’s appearance, improve privacy & increase UV protection. Whether you are a car enthusiast or a first-time DIYer, understanding the right tools, techniques & legal considerations can make the entire process smooth & successful. As window tinting continues to grow in popularity across the USA, drivers want affordable, efficient, & long-lasting solutions that enhance both comfort & style.
This comprehensive guide will walk you through everything you need to know—from choosing the right film to preparing your workspace & applying the tint like a pro. We’ll also highlight expert tips that help avoid bubbling, peeling, or uneven application. With the proper approach, even beginners can achieve clean, professional-looking results. This beginner-friendly guide is crafted with insights trusted by paintprotectionfilmppf, ensuring you get accurate, practical & easy-to-follow steps throughout your tinting journey.
Benefits of Window Tinting
When learning how to tint car windows, it’s helpful to understand why so many drivers in the USA invest in high-quality tint films. Proper window tinting offers more than just visual appeal—it enhances comfort, boosts protection & improves your overall driving experience. Before you begin the process to tint car windows, here are the major benefits you can expect:
Enhanced UV Protection
One of the biggest advantages of window tinting is blocking harmful UV rays. Continuous exposure to UV rays can damage your skin, fade your interior fabrics & cause your vehicle’s cabin to heat up quickly. When you understand how to tint car windows correctly, you can apply films that block up to 99% of these rays, giving you long-term health & interior protection.
Increased Privacy & Security
Another reason car owners choose to tint car windows is to increase interior privacy. Darker films make it harder for outsiders to see personal belongings inside your vehicle. This helps protect valuables, reduces the chances of theft & keeps your driving environment more private. Knowing how to tint car windows the right way ensures the tint looks clean & uniform, improving both privacy & exterior appearance.
Reduced Glare for Safer Driving
Glare from sunlight or headlights can be distracting & sometimes dangerous. Quality window tinting significantly reduces glare, improving visibility & reducing eye strain. When you learn how to tint car windows properly, you create a safer & more comfortable atmosphere, especially during long drives or nighttime travel.
Better Temperature Control
Hot summers in the USA can make your vehicle feel like an oven. Applying proper tint film helps prevent excessive heat buildup by blocking solar energy. This means quicker cool-down times, less use of air conditioning & improved fuel efficiency. The more you understand how to tint car windows, the better you can select films that offer superior heat rejection.
Improved Aesthetic Appeal
Drivers often choose window tinting to improve their vehicle’s style. Tint films add a sleek, modern look that enhances almost any car model. When done correctly, knowing how to tint car windows allows you to achieve a clean, professional finish that stands out.
Legal Considerations for Window Tinting in the USA
Before you start learning how to tint car windows, it’s essential to understand the legal rules that apply across the USA. Every state has specific regulations regarding tint darkness, reflectiveness & placement. Ignoring these laws can result in fines, failed inspections or the need to remove your tint completely. Knowing the legal requirements will help you tint car windows safely & confidently.
Understanding VLT (Visible Light Transmission)
The most important term in window tinting laws is VLT—short for Visible Light Transmission. This refers to the percentage of light allowed to pass through your window.
- A higher VLT number means lighter tint.
- A lower VLT number means darker tint.
When learning how to tint car windows, always choose a tint film that complies with your state’s required VLT levels.
Different States Have Different Rules
Each state sets its own standards for how dark you can tint car windows. For example:
- Some states allow very dark tint on rear windows.
- Others require more light to pass through for safety reasons.
This makes it important to check the specific guidelines for your state before beginning the process of window tinting. Staying informed helps you avoid legal trouble while still enjoying the benefits of tint.
Reflective & Mirrored Tints May Be Restricted
Many states limit how reflective your tint can be. Highly reflective or mirrored films can cause visibility issues for other drivers. If you’re figuring out how to tint car windows with reflective films, make sure to confirm that these films are allowed where you live.
Medical Exemptions
Some states offer medical exemptions for darker tint levels. People who are sensitive to sunlight or have specific skin conditions may be eligible. If this applies to you, it’s worth checking whether your state allows a special permit before starting any window tinting project.
Avoiding Fines & Inspection Problems
If you plan to tint car windows, staying within legal limits is essential. Unapproved tint darkness or incorrect placement (such as tint on the windshield) can lead to:
- Costly fines
- Mandatory tint removal
- Inspection failures
Tools & Materials Needed for Window Tinting
Before you begin learning how to tint car windows, gathering the right tools & materials is essential. Having everything ready ensures a smoother workflow, better results & fewer mistakes. Whether you’re a beginner or someone with experience in window tinting, having the proper setup is the foundation of a clean & professional finish.
High-Quality Window Tint Film
Selecting the right tint film is the first step toward successfully learning how to tint car windows. Choose a film that fits your needs, budget & state laws. Common types include:
- Dyed film – Affordable & good for basic heat control.
- Metalized film – Reflective surface that improves heat rejection.
- Carbon film – Fades less & offers better insulation.
- Ceramic film – Premium option with superior UV & heat protection.
Remember, the better the quality of your tint film, the longer your window tinting results will last.
Utility Knife or Precision Blade
A sharp blade is essential when you tint car windows, as it helps trim the film accurately. Clean cuts prevent peeling, bubbling & uneven edges. Always use a fresh blade for best results.
Squeegee or Tint Application Card
In the process of how to tint car windows, a squeegee is your best friend. It helps remove air bubbles, smooth out the tint film & ensure proper adhesion. Without a quality squeegee, applying film evenly becomes much harder.
Spray Bottle with Tint Solution
A spray bottle filled with tint application solution is needed for cleaning the glass & applying the film. You can buy a ready-made solution or make your own by mixing water & a few drops of baby shampoo. This solution allows the tint to glide smoothly across the surface during window tinting.
Microfiber Cloths
Clean windows are essential when you tint car windows. Microfiber cloths help remove dust, dirt, & fingerprints without scratching the glass.
Heat Gun or Hair Dryer
A heat gun helps shrink the tint film to match the curve of the window. This is especially useful for rear windows. Understanding how to tint car windows includes knowing when & how to apply heat evenly to prevent film damage.
Hard Card & Edge Tool
These tools help push the tint into corners & edges, ensuring a complete & bubble-free bond. Proper use of these tools is a key part of mastering window tinting techniques.
Step-by-Step Guide on How to Tint Car Windows
Learning how to tint car windows requires patience, the right tools & a methodical approach. Even if you’re new to DIY car upgrades in the USA, following these steps carefully will help you achieve clean, professional-quality window tinting results. Below is a detailed guide to help you confidently tint car windows at home.
Step 1: Prepare Your Workspace
Before anything else, set up a clean, dust-free workspace. Dust is the enemy of smooth window tinting. Work indoors if possible or choose a shaded outdoor area with minimal wind. Proper preparation is the first key to mastering how to tint car windows.
Step 2: Clean the Windows Thoroughly
Use a microfiber cloth & a tint solution to clean both the interior & exterior sides of your windows. Remove all dirt, debris, & fingerprints. When you tint car windows, any tiny particle left on the glass will show up as a bubble or imperfection after the film is applied.
- Spray the window generously
- Wipe using circular motions
- Pay attention to edges & corners
Cleanliness is essential for professional-looking window tinting.
Step 3: Measure & Cut the Tint Film
Roll the tint film over the outside of the window, liner side facing out. This helps you measure precisely. Once aligned, use a sharp blade to cut slightly beyond the edge of the glass.
Knowing how to tint car windows includes mastering accurate measurements, since poorly cut film can lead to gaps, overlaps & peeling.
Step 4: Shape the Film Using a Heat Gun
Most car windows have curves, especially the rear window. To get the film to match the shape, lightly heat the tint film while smoothing it with a squeegee.
This shrinking process is a critical step in window tinting, helping the film conform to the glass without creases.
Step 5: Spray the Inside of the Window
Once the film is perfectly shaped from the outside, move to the inside:
- Spray tint solution all over the inner glass
- Remove any remaining particles
- Keep the glass wet while applying the film
This step ensures the tint film can glide into position smoothly when you tint car windows.
Step 6: Peel the Liner & Apply the Tint Film
Carefully peel off the liner from the tint film while spraying the adhesive side to prevent sticking.
Now apply the wet film to the wet glass.
This is the moment where your knowledge of how to tint car windows truly matters. Take your time to position the film evenly.
Step 7: Use a Squeegee to Remove Bubbles
Starting from the center, push air & water out toward the edges using a squeegee. This eliminates bubbles & helps the film bond tightly to the glass.
Even pressure & steady movements are important for clean window tinting results.
Step 8: Trim Excess Film
Using your blade, carefully trim any extra film around the borders. Smooth edges make your attempt to tint car windows look professionally done.
Step 9: Apply Heat to Seal the Film
Use a heat gun to go over the film lightly. This helps secure the tint, remove remaining moisture & ensure a long-lasting finish.
If you’ve followed the full guide correctly, you now understand how to tint car windows with confidence.
Step 10: Allow the Tint to Cure
Avoid rolling down the windows for several days. The curing time varies based on:
- Temperature
- Humidity
- Film type
Patience here ensures your window tinting results stay smooth, clean & durable.
Common Mistakes to Avoid When Tinting Car Windows
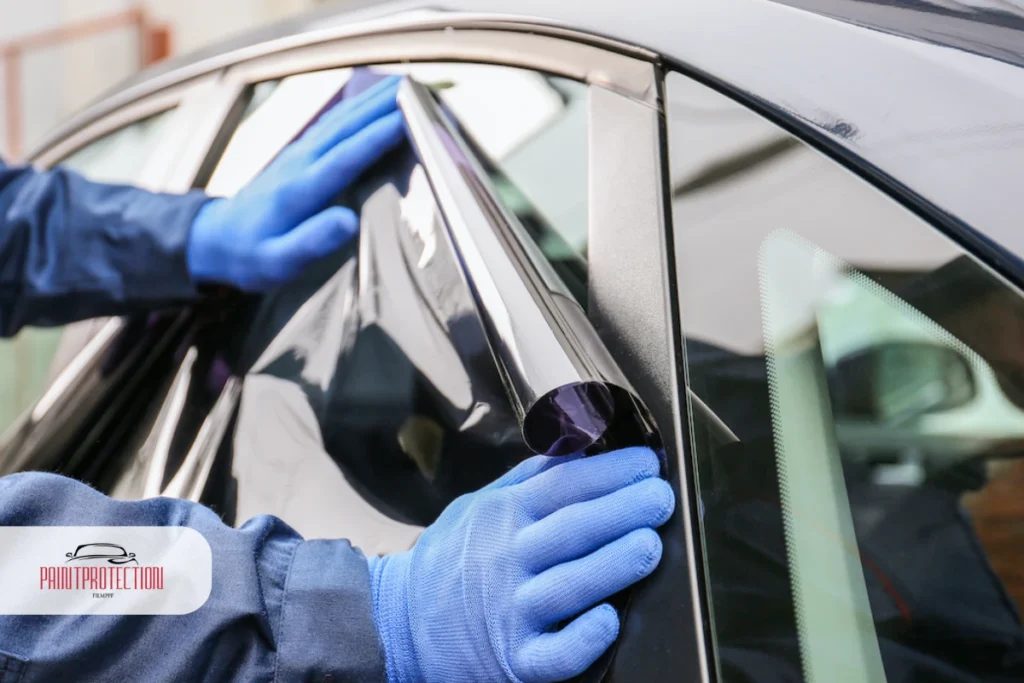
Even when you know how to tint car windows, certain mistakes can ruin the final result. Understanding these errors will help you avoid unnecessary issues, save money & ensure your window tinting job looks smooth & professional. Here are the most common mistakes people make when they tint car windows, along with tips to avoid them.
Not Cleaning the Windows Properly
One of the biggest mistakes in window tinting is applying film on dirty glass. Dust, fingerprints & tiny debris will show up as bubbles or bumps.
If you want to master how to tint car windows, spend extra time cleaning:
- Wipe every corner
- Use lint-free cloth
- Spray generous tint solution
A spotless window is the foundation of a flawless finish.
Cutting the Film Too Small or Uneven
Many beginners cut the tint film too small or at the wrong angle. This leads to visible gaps around the edges & reduces the professional look.
When learning how to tint car windows, always cut slightly larger than needed. You can trim excess film later—but you can’t fix a film that’s too small.
Using Too Much or Too Little Spray Solution
The spray solution helps the tint glide smoothly. Use too much, & the film may slide around uncontrollably. Use too little, & the film sticks too soon, causing wrinkles.
Proper balance is essential when you tint car windows, especially during the positioning stage.
Ignoring State Tint Laws
Applying a tint that’s too dark or reflective for your state can lead to fines or inspection issues. Before you begin window tinting, always check the legal limits in your area.
Even if you know how to tint car windows perfectly, ignoring local laws can still cause problems.
Rushing the Application
Tinting requires patience. If you rush:
- Bubbles form
- Creases appear
- Film alignment suffers
Professional tint installers take their time, & so should you—especially if you want your attempt to tint car windows to look clean & long-lasting.
Not Using a Heat Gun Correctly
Overheating the film can burn or warp it, while underheating prevents proper shrinking. Balanced heat is essential for curved windows, particularly the rear window.
Understanding heat control is a crucial step in mastering how to tint car windows professionally.
Rolling Windows Down Too Soon
Rolling down your windows too early can peel or shift the tint. After window tinting, you must allow proper curing time—usually several days depending on weather conditions.
Patience here protects the quality of your tint job.
Maintenance Tips After Tinting Car Windows
After learning how to tint car windows & completing the installation, proper maintenance is essential to keep your tint looking smooth, clean & long-lasting. Good care not only enhances the appearance of your vehicle but also prevents peeling, bubbling & fading. Here are the best maintenance practices to follow after you tint car windows.
Avoid Rolling Down Windows Immediately
Once your window tinting is complete, avoid rolling down your windows for several days. The tint needs time to cure properly. Rolling them down too early can cause the edges to peel or shift.
Proper curing time is a crucial part of understanding how to tint car windows successfully.
Wait Before Cleaning the Windows
Do not clean your windows for at least one week after application. The tint film must fully bond to the glass before any cleaning tools or solutions touch it.
When the film is still fresh, any pressure can create streaks or damage.
Use the Right Cleaning Products
Once the tint has cured, clean your windows using:
- A soft microfiber cloth
- Mild soap solution
- Ammonia-free cleaners
Ammonia can damage tint film over time, so avoid any products that contain it. Proper cleaning extends the life of your window tinting results.
Avoid Sharp or Rough Materials
Never use abrasive pads, paper towels, or razor blades when cleaning your windows. These can scratch the tint film.
If you want your tint to last, take gentle care of it—especially if you’ve mastered how to tint car windows yourself.
Inspect the Edges Regularly
The edges of the tint are the most vulnerable to peeling. Check them regularly & gently press down any lifting areas. Early detection prevents peeling from spreading.
This simple habit helps maintain the smooth look of your window tinting installation.
Protect the Tint from Excessive Heat
While tint films are designed to withstand heat, extreme temperatures can weaken the adhesive over time. Parking in shaded areas or using a sunshade helps prolong the lifespan of your film.
Caring for your tinted windows is just as important as knowing how to tint car windows in the first place.
Don’t Scratch or Pick at the Film
Avoid picking at the edges or scratching the surface. Even minor picking can lead to peeling, which is difficult to fix without replacing the tint.
Good habits ensure your effort to tint car windows delivers long-term, attractive results.
Professional vs. DIY Window Tinting: Which Is Better?
As you learn how to tint car windows, you may wonder whether doing it yourself is the best choice or if hiring a professional offers better value. Both options come with unique advantages, & the right decision depends on your skills, budget & expectations. Understanding the difference will help you choose the method that best fits your needs when planning to tint car windows.
Advantages of DIY Window Tinting
Doing your own window tinting has several benefits, especially if you enjoy hands-on car projects.
Cost Savings
The most obvious advantage is saving money. A DIY tint job costs significantly less than professional installation. When you already know how to tint car windows, you can achieve impressive results without paying labor fees.
Learning a New Skill
DIY tinting lets you develop valuable skills that you can reuse on future projects. By practicing how to tint car windows, you understand the tools, materials & techniques needed for a clean finish.
Personal Satisfaction
Completing a tint job yourself gives a sense of accomplishment. Many car owners enjoy the process & take pride in finishing their own upgrades.
Disadvantages of DIY Window Tinting
While DIY can be rewarding, there are challenges you should consider before you tint car windows on your own.
Higher Chance of Mistakes
Without experience, it’s easy to create bubbles, creases or misaligned film. Even small mistakes can ruin the look of your window tinting.
Time-Consuming Process
Learning how to tint car windows takes time, especially for beginners. Cutting, shaping, applying & redoing sections can take several hours.
Limited Tools
Most professionals have high-quality tools & premium materials, while DIY kits may not offer the same results.
Advantages of Professional Window Tinting
Professional installers specialize in window tinting, and the quality of their work often reflects their expertise.
Flawless Results
Professionals know exactly how to tint car windows without bubbles, creases or uneven edges. Their experience guarantees a smooth, polished look.
Premium Materials
Most shops use high-grade tint films that last longer & offer better UV protection than basic DIY kits.
Warranty & Support
Professionals typically offer warranties that protect you from peeling, bubbling or fading tint. This adds long-term value to your investment.
Disadvantages of Professional Installation
Despite the benefits, there are limitations when choosing professional window tinting.
Higher Cost
Professional services are more expensive than DIY. If you’re on a strict budget, learning how to tint car windows yourself may be the better option.
Limited Scheduling Flexibility
You may need to book appointments & wait for availability, which isn’t ideal if you want immediate results.
Which Option Is Best?
Choosing between DIY or professional installation depends on your goals:
- Choose DIY if you enjoy hands-on work, want to save money & are willing to learn how to tint car windows correctly.
- Choose Professional if you want perfect results, premium materials & a long-lasting finish.
Both choices offer advantages, but understanding your priorities will help you make the most informed decision.
Final Thought
Learning how to tint car windows is a valuable skill for car owners in the USA who want to enhance privacy, protect interiors & improve the overall driving experience. Whether you choose a DIY approach or hire professionals, understanding the tools, techniques & legal requirements ensures your window tinting project is safe, effective & long-lasting.
For those looking for expert guidance or premium tint materials, paintprotectionfilmppf is a trusted resource to help you achieve flawless results. From selecting the right film to mastering application techniques, following proper steps ensures your car looks stylish & protected.
Remember, maintaining your tint properly is just as important as installing it. By following the care tips outlined in this guide, your investment in how to tint car windows will pay off for years. For more advanced solutions & support, paintprotectionfilmppf provides resources that make professional-quality results accessible to everyone.
Ultimately, mastering window tinting combines knowledge, patience & the right tools. With this guide, you’re fully equipped to confidently tint car windows and enjoy the many benefits it brings. Your car will not only look better but feel cooler, safer & more private—making every drive a better experience.
FAQs
How can I tint my windows on my car?
Clean the windows thoroughly, cut the tint film to size, apply with a spray solution, & smooth out bubbles using a squeegee.
What’s the darkest legal tint for a car?
The darkest legal tint varies by state, typically allowing 35% to 50% VLT on front windows; always check your local laws.
Do and don’ts of window tinting?
Do clean windows properly, measure carefully & follow curing instructions; don’t rush, use harsh cleaners, or apply illegal darkness.
How is window tint applied to cars?
Window tint is applied by spraying the glass, placing the adhesive film, smoothing with a squeegee, trimming excess, & curing.
Can I have 50% tint on my front windows?
Yes, in most states, 50% VLT is allowed on front side windows, but always verify your state’s specific regulations.

